A SIMPLE CUSTOM KRUNKER UI MADE 100% IN-BROWSER W/ ONLY CSS
A GUIDE ON HOW TO SET UP, MODIFY, AND USE CUSTOM UIs
UPDATE 7.15.20: Note that I am using the Resource Swapper as my main method of installing the CSS. But the Chrome Overrides continues to remain the best way to make a customUI and make tweaks to it. Also, the Krunker client I am using is called the “IDKR Client” by Mixaz (same maker as the custom krunker client). It supports the use of both resource swapper AND Chrome Overrides.
UPDATE 7.3.2020: You can get my latest CSS UI (main game only, no market CSS) if you scroll to the bottom of this page. I’ve made some recent updates, mainly for performance.
WARNING: Experiment at your own risk. But don’t worry, there’s not too much risk aside from spending hours just messing around. It’s not feasible for me to provide tech support here because there’s too many variables. I think it’s more efficient to learn a bit of CSS and HTML so you can adapt to the constantly-changing game of Krunker. The fact that Krunker even supports this functionality is pretty amazing. So don’t get frustrated, just read the guide again, and try different methods. Most of these methods below didn’t for me at first, and then I realized something is slightly wrong, and I try again.
TABLE OF CONTENTS
SETING UP YOUR PROJECT FOR MAKING A UI - LIVE TESTING CSS USING CHROME LOCAL OVERRIDES
WHAT IF I JUST WANT TO INSTALL A CUSTOM UI?
(this part covers installation on various Krunker Clients, Web-browsers, and more)
A Custom Krunker CSS guide meant for:
Those who play Krunker in-browser and want to use someone else’s CSS
Those who want to know the best way to live test CSS to create their own Krunker UI
Those who want to use my CSS, regardless of whether they are playing on a client, in-browser, etc.
For now, I am coverring the method of testing/writing/and using CSS via the Chrome Dev Tools Local Overrides Feature but I will expand this guide in the future to include more methods. Read the guide whether you want to use someone else’s UI, create your own, or use mine.
One of the best parts about Krunker is the insane ability to modify and customize the game. Since it’s a browser game, many of the game’s elements are made with HTML and CSS. Lately, there is official support for CSS in-game, although people have been doing this even earlier.
I made this UI originally for a video, but now I plan to keep it updated.
LEARN HOW TO MAKE A CUSTOM KRUNKER UI WITH PHILZGOOD UI
If you want to make your own Krunker UI, first I recommend reading this guide and then watching the video I embedded a few times. We will use my UI as an example to help you better understand how to write your own. If you've never used code, HTML, or CSS before but have a spare 2-3 hours to spare, it is well-worth trying to learn via attempting to make a Krunker UI. It could even end up changing your life. Because if you learn something in the context of an interest (such as Krunker), it will be a lot easier.
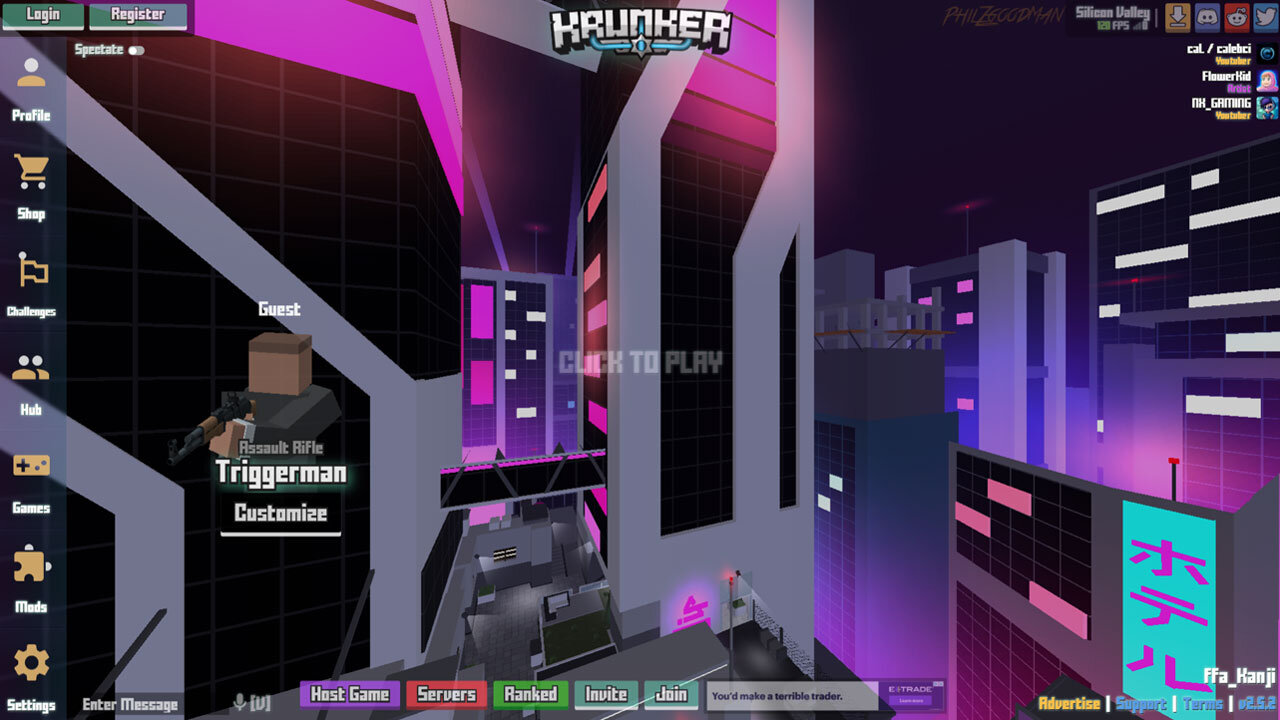
A bit about my UI example below. The first question you want to ask yourself is: “What changes do I want to make? Why should I make these changes?”
The goal is similar to my mod “philzgoodmod” - I don’t want to change the game too much since I want to keep the original spirit of the game in there, just add some user benefits.
The main benefit is more awareness and visibility when you are on the menu screen. That’s why I move the menu window to the left-hand side.
In fact, all of the buttons are now in the bottom or left of the screen to make things simpler.
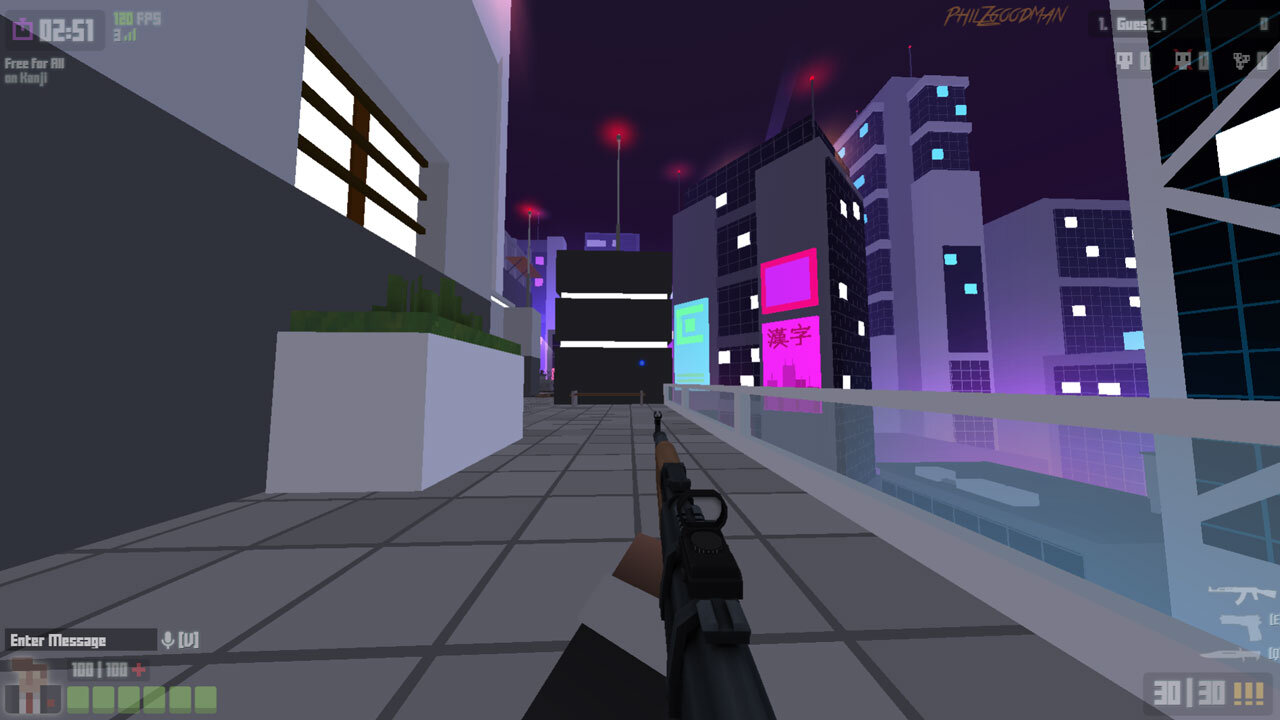
There is greater transparency so you can see more of the game when you’re dead.
This mod does not use any external assets (except for one, but you can remove it - that’s just 1 philzgoodman branding image hosted on a squarespace CDN).
You don’t need to use the Krunker Resource Swapper unless you use it for CSS loading purposes.
INFO - MY CSS CODE FOR REFERENCE
The URL for the CSS file is “philzgoodman.com/s/main_custom.css”. I will try to keep it at the same URL. But actually, you don’t need this URL since you can copy the text into your own file. Of course if it’s easier and works for you, then you should use the URL method.
Dropbox Link here: https://www.dropbox.com/s/93xg68wdyp3eblg/main_custom.css?dl=0
SETING UP YOUR PROJECT FOR MAKING A UI - LIVE TESTING CSS USING CHROME LOCAL OVERRIDES
The key point in the video above is that using Chrome Local Overrides I think is the best way to make a custom UI. Changes you make to the CSS are semi-permanent, but also you can make changes on the fly. You have the benefit of using Chrome’s good editor, that will show when there’s syntax errors and color code things, and suggest values of CSS properties for you to use. Yes this works in Brave Browser.
Open up Krunker in your browser.
Open Chrome Dev Tools by pressing CNTRL + SHIFT + I or F12.
In Dev Tools, Click on “Sources” panel.
Within Sources Panel, click on “Overrides.”
Check “enable local overrides.”
Select an empty folder (location doesn’t matter) for your overrides. You don’t need to do anything w/ this folder. Be sure to click “allow” when Chrome prompts you at the top of your browser to “allow” overrides.
Next, still within sources panel, go to “pages”. Then, in the navigator, go to Top -> Krunker.io -> CSS. Double-click on “main.css” and “main_custom.css”. They will open up as tabs in the dev tools browser.
If you simply want to set up a custom UI using someone else’s CSS, you do NOT even need to bother looking at “main.css”. All you have to do is copy paste the CSS into “main_custom.css” and save (CNTRL + S).
Check to see that the overrides work. When you change the CSS or paste in CSS, you should see changes IMMEDIATELY. However, you can double-check by toggling on/off "the “enable overrides” check box.
Once you see it’s working, close Dev Tools. The changes will still work.
This is the simplest method BUT you will have to open / close dev tools each time you launch the browser. However, everything else will be saved (you don’t need to re-enable overrides.
Other notes:
If you keep dev tools open, you can make changes using this method and see them immediately, so it’s really the best way to test/design/debug CSS.
WARNING: if you are actually playing the game and forget to close dev tools, it does take up computer resources. So it’s best to close dev tools after styling is applied.
There is a way to make Chrome auto-open dev tools and apply overrides. However, when I was using this method via “chrome line commands” it lead to unintended consequences, so I won’t share this method for now.
You can turn Krunker into its own app on the desktop! It even works w/ NVIDIA control panel too.
Step 1: Go to Krunker.io and before you are placed in a server, hit “esc” to cancel loading.
Step 2: Click the “…” menu at the top right of browser and click “more tools” -> “create shortcut” and before you click, check the “open as window” box.
That’s it! Now Krunker is on your desktop as an app.
WARNING:
Krunker game updates may result in the CSS not working. To do this, you basically need to set up the main_custom.css file again since the file has been updated w/ a new build.
Step 1: First, you need to back up your overrides. You should do this regularly. I just copy/paste it into a text file. Navigate to wherever you created your Chrome overrides folder to find main_custom.css.
Step 2: disable and clear any overrides you set up previously.
Step 3: Create a new folder and I advise you keep the folder empty. I just make a folder on my desktop called “Krunker Overrides” and when I need to reset everything, I create subfolders w/ the date (for example, 6.16.20).
Step 4: Then, in Chrome set up overrides again and click the empty folder.
Step 5: Go to your backup and copy the text
Step 6: Go to Sources -> Page -> Top -> Krunker -> CSS -> main_custom.css and double click it to open as a tab.
Step 7: Paste in your backup and you’re all set!
I will be updating this guide in the future to include more methods on how to use custom CSS. If you want to use the Krunker Resource Swapper, I don’t know much about it since I didn’t find it to be the best user experience. However, I’m sure there’s a lot you can do w/ it and may be a good approach if you want to swap assets (png, textures, obj, etc.) I recommend you check out Quacky’s YT channel since he does talk about the Resource Swapper and has good tutorials. I DO however, cover how to install custom CSS via resource swapper in this guide.
WHAT IF I JUST WANT TO INSTALL A CUSTOM UI?
HOW TO INSTALL CUSTOM CSS USING THE CUSTOM KRUNKER CLIENT
Don’t let the name fool you, the Custom Krunker Client is an independently-developed client (like MTZ client and CClient). The Custom Krunker Client is a lesser-known Krunker Client, and while the developer is not certain of its future, I found that this was by far the most simplest and intuitive way to install custom CSS. You can get the Custom Krunker Client here: https://github.com/Mixaz017/Custom-Krunker-Client .
Installing CSS is super simple, literally anyone can do it:

Steps:
Copy the a hosted link of a custom UI, you can use mine for example: philzgoodman.com/s/main_custom.css
Paste it into the box in settings and that’s it!
HOW TO INSTALL CUSTOM CSS ON THE OFFICIAL KRUNKER CLIENT
Here’s how you can load a custom css file into the Official Krunker Client. The Official Client comes with a Resource Swapper built-in. There’s a default directory that’s typically in C:/ -> Users -> [username] -> documents -> KrunkerResourceSwapper.

Just put the main_custom file right HERE!!!
I realize that the process is easier than I originally thought. While using this method doesn’t have the same advantages of “live-testing” changes like the Chrome method, it does load the file locally, so perhaps there is a performance benefit. Also, I found it relatively simple to make minor tweaks.
HOW TO INSTALL CUSTOM CSS ON OTHER 3RD-PARTY KRUNKER CLIENTS SUCH AS MTZ
I may update this section later since I’m not sure yet how to install custom CSS on MTZ or other 3rd-party clients (aside from the Custom Krunker Client). I’m not saying these clients are bad, but I just don’t really use them. I will update this section later.
HOW TO INSTALL CUSTOM CSS USING A BROWSER EXTENSION
Although I don’t yet have experience with this method, just follow Tehchy’s instructions to load custom CSS as a browser extension: https://github.com/Tehchy/Krunker-Resource-Swapper.
HOW TO INSTALL CUSTOM CSS TO BRAVE BROWSER
It’s literally the same as either the Tehchy method above, or the “inspect” method w/ local overrides. Brave is a Chromium-based browser. Head back over to the top of this guide for more details on using the “inspect/overrides” method.
PHILZGOOD UI (Updated Regularly as I make changes) - COPY/PASTE MY CSS CODE
UPDATE: 7.15.2020: Updated to remove even more effects for optimal performance
UPDATE: 7.3.20: More performance optimizations
UPDATE: 6.19.20: Unfortunately, the backdrop-filter and filter properties were giving me performance issues and crashing so I removed them :( Not much else is changed. The code seems to be stable.
Below you will find the CSS code. Copy paste everything into the main_custom.css.
.headerBar {
    background: rgba(0, 0, 0, 0.18);
    box-shadow: inset 60px 0 120px #ff00ff1c, inset -60px 0 120px #00ffff1f;

}

#mainLogo {
    height: 100px;

}

.menuItem {
    background: rgba(0, 0, 0, 0.18);
    box-shadow: inset 60px 0 120px #ff00ff1c, inset -60px 0 120px #00ffff1f;

}

#aContainer {
    position: fixed;
    transform: scale(0.6);
    bottom: 0%;
    right: 22%;
    z-index:9999999999;
}
#aMerger {
    pointer-events:none;
    margin-left: 73%;
    margin-bottom: -5.2%;
    background-image: url("https://www.philzgoodman.com/s/philzwebsitepromo.png");
    background-size:25%;
    background-repeat: no-repeat;
}

.headerBarRight {
    opacity: 0.5;
}

#merchImg {
    display: none;
}

#gameUI {
    opacity: 0.5;

}

#leaderDisplay {
    background-color: rgba(13, 13, 13, 0.85);
}


.twitch {
    display: none;

}

.youtube {
    display: none;
}

.esports {
    display: none;
}

#menuWindow {

    position: fixed;
    left: 22%;
    top: 6%;
    z-index: 999999;
    height: fit-content;
    max-height: 800px;
    opacity: 0.9;

}


#settName {


    z-index:9999999;
}

#menuClassName {
    filter: drop-shadow(4px 4px 10px #6dffd28f);
}

#menuClassContainer {
    opacity: 0.9;
    position: fixed;
    left: -62%;
    bottom: -2%;
    transform: scale(1.1);
    z-index: 999999;
}

#customizeButton {
    z-index: 999999;
}

#subLogoButtons {
    bottom: 1.6%;
    left: 36%;
    opacity: 0.9;
}

#customizeButton {
    width: 5%;
    background-color: black;
    padding-top: 12px;
}

.button {
    box-shadow: inset 0 -7px 0 0 #ffffff;
    background-color: #6dffd28f;
    opacity: 0.8;
}


.buttonR {
    opacity: 0.8;
    grayscale(10%); }

.buttonP {
    opacity: 0.8;
    grayscale(10%); }

.buttonG {
    opacity: 0.8;
    grayscale(10%); }